 \
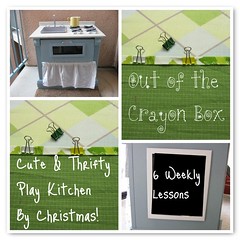
\OK, so that was six lessons! And this doesn't really count as a lesson. Rather it's a wrap up.
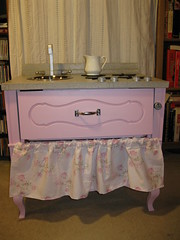
Here is my cost breakdown:
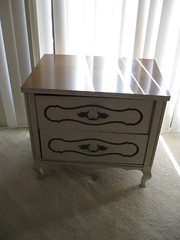
Little nightstand- $5.00
Bowl- $ 2.00
Corner braces -$2.39
Hinges-$1.89
Hardboard sheet -$3.72
Wood Scrap- $0.50
Knobs for sink $1.50
Faucet- $2.00
Stone Spray Paint (on sale) $6.00
Handle $0.25
Chopsticks for burners $1.00
Baking pan for magnetic chalkboard $1.00
Adhesive Velcro squares $1.00
Tarp to protect my living room carpet $1.00
Patient Hubby- Priceless
Grand Total - About $30 - Not too shabby for a Shabby Chic Play Kitchen!
I used paint, glue, varnish, dowels and fabric from my "stash, " so I realize that it was cheaper for me than someone starting from scratch.
This has been a lot of fun for me. I love seeing your creations. I have stumbled on a few play kitchens inspired by my methods over the past year and it's really just the neatest thing. It's the teacher in me, I love it!
The other day, I found Lisa's fabulous creation. She added a shelf and pot rack to her play kitchen. You have to go see it! Lisa tells me that it's hiding under a sheet in the garage and her daughter has no clue! I can not wait to see Christmas day reveal or play pictures. I mean, it's fun to make them, but seeing them in action- that's the cherry on top!
Updated: Speaking of action shots...this is adorable!
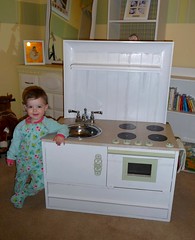
The kitchen and the baby made by Ann Marie and she has tons of great ideas listed here.
There are other great kitchens popping up in the Play Kitchen Build Along Flickr group. You have to check out this *free* play kitchen from Dixicowgirl. The red and green color combo gets me every time. She was super resourceful using stuff from around her house and she used the bottom drawer to make a hutch!
How are you doing? If you have pictures, please post them to the Flickr group to inspire others. If you would like to post your picture but do not have a blog or Flickr account, you can email it to me (at janeclifflittle at yahoo dot com) and I will post it for you!
Play Kitchen Series:
Introduction
Lesson 1 Supplies
Bonus Lesson: Tool Free Options
Lesson 2- Demo, Shelves, Construction
Lesson 3 Assembly & Body Paint
Lesson 4 DetailsBlogger: Out of The Crayon Box - Create Post
Lesson 5 Final Touches
Lesson 6- Wrap Up (This post here- so really it was five lessons!)
My Play Kitchen Inspiration
Thanks for building along!
Updated: Sorry! I didn't have the Flickr Build Along Group linked! Be sure to check it out!
6 comments:
It is so cute. You did a great job.
Thanks for making this so much fun! I can't wait to make another one :)
xoxo ~Lisa
You are so talented!!!
Could you post a link to the Flickr group so that we can see other's kitchens? Thanks!
Jane,
Wish I could have participated this time around, but I will definitely be following your tutorial soon!
Thanks for sharing this with us!
Yay for done kitchens!
I still have a lot to do, but it's going well :)
Can't wait to show you...
Post a Comment